7 Tips for Choosing the Best Liquid Filling Machine

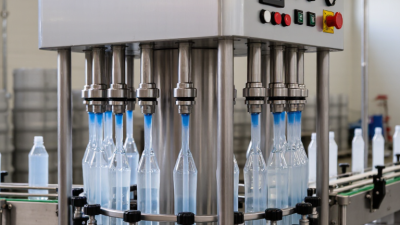
Choosing the right liquid filling machine begins with the product, not the brochure. A thin beverage flows differently from a thick sauce or a foaming cleaner. Even small changes in temperature can affect fill speed and accuracy. Container shape matters, too. A narrow bottle neck may need a different filling nozzle from a wide jar. The wrong match can mean drips, uneven fills, and extra cleaning. Not every impressive specification helps your line.

Manufacturing quality expert W. Edwards Deming warned, “A bad system will beat a good person every time.” His point applies to filling lines: skilled operators cannot compensate for equipment that does not suit the product, containers, or production pace. Use this guide to compare seven practical factors, including filling technology, accuracy, changeover time, cleaning needs, and room for future growth. Ask suppliers for demonstrations using your actual product and containers. Watch the nozzle, check the fill level, and note how long adjustments take. Details matter.

There is no universal best machine. A compact tabletop unit may be right for short runs, while a growing facility may need automation and multiple filling heads. Budget matters, but so do maintenance access, training, and the cost of downtime. Some requirements only become clear after testing; that is worth admitting early. These seven tips will help you ask sharper questions, compare options fairly, and choose a liquid filling machine that fits the work your team actually does.
7 Tips for Choosing the Best Liquid Filling Machine

Measure Viscosity First: Water Is About 1 mPa·s at 20°C

Viscosity is a useful starting point when selecting a liquid filling machine. At 20°C, water measures about 1 mPa·s, making it a convenient reference for thin liquids. But your product may behave differently. Temperature, ingredients, and even the measuring method can change the reading. Test a representative sample at the temperature it will reach during filling. Record the instrument and test conditions, too. A viscosity value without context can mislead.

That matters. Low-viscosity liquids may drip from a nozzle or splash into a narrow container, so nozzle design and shutoff timing deserve attention. Thicker products may need a suitable pump and more time to settle into each container. A single viscosity number cannot tell you exactly how a machine will perform; I would not choose equipment from that number alone. Run a small trial with the actual liquid, tubing, nozzle, and container. Check fill-weight variation, dripping, and cleaning time. If the product warms during production, repeat the test at that temperature. It is easy to overlook this detail, and the result may be less tidy than expected.

Set a Dose-Accuracy Target, Such as ±0.5%, Before Comparing Machines

Before comparing liquid filling machines, define the dose accuracy your process actually needs. A target such as ±0.5% gives suppliers a clear benchmark, but it should match the product, container, and production goal. For a 100 mL fill, that range allows a variation of just 0.5 mL. Small differences add up across a long production run.

Ask how accuracy is measured. A machine may show consistent results during a short demonstration but behave differently after extended operation. Test multiple fills at the beginning, middle, and end of a run. Weigh each sample on a suitable scale, and record the liquid temperature and machine settings. If results are reported by weight, confirm how density is handled when your specification is based on volume. Accuracy and repeatability are related, but they are not interchangeable.

Use your actual liquid for trials whenever possible. Viscosity, foaming, dripping, and temperature can all affect the dose. A ±0.5% target may be achievable for one product and unrealistic for another. That part is easy to overlook. Ask for test data under conditions similar to your line, including the intended container and operating speed. Then check whether the stated tolerance applies to every fill or to an average. A few neat samples can look convincing; they may not tell the whole story.

Calculate Throughput: 60 Bottles per Minute Equals 3,600 per Hour

A filling machine rated at 60 bottles per minute can process 3,600 bottles in one hour on paper. That figure assumes continuous operation, steady product flow, and no interruptions. Real production includes pauses for bottle changes, adjustments, cleaning, and occasional rejected fills. Viscous liquids may also need more time to settle between cycles. Fast is not always steady.

Tip: Compare the rated speed with your required good output. If your target is 3,000 saleable bottles per hour, ask whether the machine can maintain that pace during a full shift. Test it with your actual liquid, bottle size, and closure setup. Count accepted bottles, not just filling cycles. Small details matter.

A short trial can reveal what a brochure cannot. Track stoppages, fill-level variation, and product drips over several hours. For example, a line running at 60 bottles per minute with 85% effective operating time produces about 3,060 bottles per hour, before rejects. That estimate is useful, but it is not a promise. Measure again after changeovers; they can take longer than expected. A little doubt helps planning.

Check Product-Contact Materials, Including 316L Stainless Steel

A liquid filling machine may have a polished frame, but the product-contact path deserves closer inspection. This includes the tank, pipes, valves, pump, filling nozzles, and seals. For acidic, salty, or frequently cleaned products, material compatibility can affect corrosion, hygiene, and service life. 316L stainless steel is often selected for its molybdenum content and improved resistance to pitting. Still, the grade alone does not guarantee a suitable machine.

Ask for material certificates that identify the alloy used on every wetted component. Then inspect the actual surfaces, not only a specification sheet. Look for smooth welds, clean joints, and corners that can be reached during washing. Crevices and stagnant pockets may hold residue, even when the visible tank looks spotless. Small details matter. A rough weld can complicate cleaning and create a place for product to linger.

Also check non-metal parts. Gaskets, hoses, and valve seats need to tolerate the product, temperature, and cleaning chemicals. Request compatibility information and confirm that replacement parts are available. It is easy to focus on stainless steel and overlook these smaller components. I would not assume that 316L is necessary for every application, either; the product and cleaning routine should guide the choice. A sample inspection or trial run can reveal issues that paperwork misses.

7 Tips for Choosing the Best Liquid Filling Machine - Check Product-Contact Materials, Including 316L Stainless Steel

Tip What to Evaluate Practical Checks Why It Matters
1. Verify product-contact materials Identify the materials used in the tank, pipes, valves, nozzles, seals, and gaskets. 316L stainless steel is commonly selected for corrosion resistance in suitable hygienic applications; it is not compatible with every chemical or process. Request a wetted-parts list and material certificates. Check compatibility against the product, concentration, temperature, and cleaning chemicals. Confirm seal and gasket materials separately. Material compatibility helps limit corrosion, contamination, and premature wear. The correct specification depends on actual operating conditions.
2. Match the filling principle to the liquid Compare filling methods such as time-pressure, piston, gear-pump, peristaltic, and gravity filling. Suitability depends on viscosity, foaming, particulates, and required dose range. Test with the actual product, or a representative liquid with similar viscosity and flow behavior. Ask whether the method can handle suspended particles without damage or blockage. A filling method suited to the product can improve dose consistency and reduce foaming, dripping, or product damage.
3. Define accuracy under real conditions Consider target fill volume or mass, acceptable variation, container type, product properties, and production speed. Accuracy can vary with these conditions. Request documented test results using the intended product or an agreed substitute. Specify the number of samples, operating speed, and measurement method in acceptance criteria. A stated accuracy figure is meaningful only when the test conditions and measurement method are clear.
4. Confirm the required throughput Estimate containers per minute or hour, accounting for fill volume, number of filling heads, changeovers, and any upstream or downstream equipment. Ask for demonstrated output with the intended container and liquid. Distinguish rated machine speed from sustained line output, which can be affected by stops and handling. Matching capacity to actual production needs helps avoid bottlenecks and unnecessary oversizing.
5. Assess cleaning and changeover needs Review clean-in-place (CIP) or clean-out-of-place (COP) options, drainability, accessible surfaces, and the number of product changeovers. Confirm which parts must be removed for cleaning, whether the equipment supports the required cleaning procedure, and how product residue is checked after cleaning. A cleaning approach suited to the process can reduce changeover time and help control cross-contamination risks.
6. Check container and format flexibility Compare the machine's supported container materials, shapes, heights, openings, and fill volumes with the formats used in production. Run representative containers through a trial. Check whether adjustments or change parts are needed for each format and how long changeover takes. Confirming format compatibility reduces the risk of spills, unstable handling, and costly modifications.
7. Review controls, safety, and serviceability Evaluate recipe settings, guarding, emergency stops, operator access, spare-part availability, and maintenance requirements. Request operating and maintenance documentation. Check applicable local safety requirements, training, service response arrangements, and the availability of wear parts. Clear procedures and maintainable design support safer operation and help reduce avoidable downtime.

Verify CIP/SIP Cleaning and 21 CFR Part 11 Controls Where Applicable

A filling machine can look spotless and still retain product in a valve seat. Verify CIP coverage at spray devices, pipe branches, and filler nozzles, then review validation records for residue limits and repeatable rinse results. SIP is different: it must demonstrate sterilization conditions at difficult-to-heat locations, not just show a target temperature on the screen. FDA’s 2022 Data Integrity and Compliance With Drug CGMP Q&A emphasizes reliable, complete records. For electronic records within applicable requirements, 21 CFR 11.10 lists 11 controls, including access limits and secure, time-stamped audit trails.

Tip: Ask for the cleaning and sterilization protocols, acceptance criteria, and failed-cycle response. Check that recipes record actual time, temperature, and conductivity—not only setpoints. Confirm sensor calibration and who can change parameters. A polished demonstration is not validation. Small details matter.

For Part 11, first determine whether the records fall under applicable predicate-rule requirements; not every machine interface automatically does. If they do, test unique user access, electronic signatures, audit-trail review, record retrieval, and backup restoration during acceptance testing. FDA’s guidance treats data integrity as a lifecycle concern, so assess configuration changes and service access too. One limitation is easy to miss: a complete audit trail cannot prove a cleaning cycle reached every surface. Pair electronic evidence with sound equipment design and documented process validation.

Error: Invalid action URL is detected.